Showing posts with label Good Days. Show all posts

Tuesday, June 26, 2012

Celebrate the BoyPart 2


His Birthday Finally Arrived!!
The Mat All Finished!!

This is the second part of the Car Mat/Blanket Tutorial, and I am as excited as you are to have it done for the boy's birthday!!

The biggest problem I had researching for this was I just needed closer and lots more pictures of what these wonderful moms had done already.  I found this place that was good, but here are mine so you have more to look at and get those creative juices flowing!

USAF Fire Station 1 complete with flag and dalmatian.

Farm where Grandma C grew up complete with apple tree, corn field, and a chicken.
The corn I hand embroidered into the striped field.  It really made it POP.

Who doesn't like their local ice cream store?
The roads are black felt heat-n-bonded on then just straight stitched with yellow along the edges.
I only used the applique stitch in black on seams where two roads met.  There is a smaller applique stitch in yellow down the middle of the roads.  This was my last sewing step and it felt good to have it down.

A downtown Chicago building.

John Hancock Building.  This one has the iron cross sections and radio  rods on top of it.
The cross sections are just straight stitching diagonally across.

'Da Bears play at Soldier Field.

My Hubby is a South-sider (White Sox) and I bleed blue (Cubs).  I tried to find some icons for it, but didn't succeed.
I will add patches later if I can find them.

School house with swings, flag, and ringing bell.

All-Star Gasoline the pumps are the ends of one shoelace. 

Train station with tracks and sign.  The sign has a train button; the tracks are black ribbon sewn
down the middle to stabilize and grey piping sewn over the ends about 1.5 inches wide.

Camping in the mountains.  The tent has red stitching to show lines in the tent, applique around,
and white lines out and to the the stakes.  The fire and trees are appliqued on wood then leaves or flames.
Mountains are for camping.  I put the "Y" detail on because our boy was born right next to a mountain
with a very similar "Y" that lit up on a good night.

Our home looks simple, but there are five separate parts to the building:  chimney, roof, structure,
windows and door.  Make sure to get every piece with your applique stitch and in an order that makes sense.

Trees were TOUGH, but we have forests in Illinois.  Everyone is slightly different, but every one was a pain
because of the curves in each one.  I skipped my normal three passes on applique and only did two on these.

Our public library has a funky roof line and TONS of glass.  

My hubby builds furniture, so naturally this is where most of the cars end up helping Dad.

I know it is supposed to have a t at the end, but t or not, the boy knows exactly what this store is.
The orange strip across the center is just the same applique technique I have been using just in a straight line.
The flag poles, radio poles, masts, swings and similar architecture features are all done the same way.


To finish off your blanket, you need to get the back material attached to your front material and bind it together.  I used clear thread and went around each buildings outline to bind the two fabrics together.  You could quilt it more traditionally if you like, but I'm lazy.  The clear thread was difficult to work with and probably took the most patience.  I made my own binding using this tutorial since I had never made my own.   Pin your tape around your blankets outer edge and sew around all the edges.  

Spread it out and get all the cars ready for a few hours of well deserved quiet time.

Entertainment for at least a few minutes!


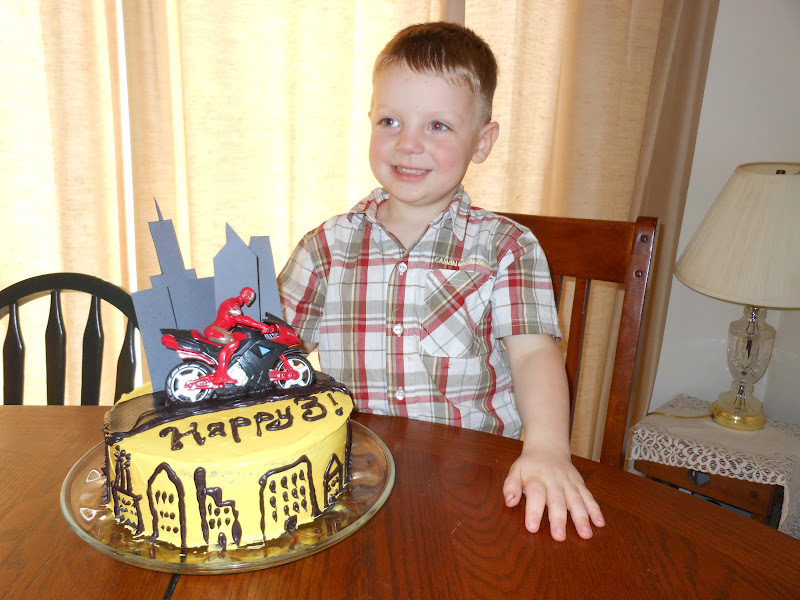
Happy Birthday My Boy!


Woke up to Balloons and a supersized poster of himself.

That is his "happy face."


Let me know what you think in the comments.  Hopefully this was helpful and you get started on your own little man's--or little girl's--car mat soon!

Monday, June 18, 2012

Summer Vacation

We have been gone on a whirlwind of a trip!  We had a family wedding to go to in Oklahoma.  Since we live in the Chicagoland area, it ended up being about 16 hours in the car with 4 kids.  Yes, we know; we are insane.  We had some good times though.  Here are just a few of the hundreds of pictures we took for our highlights.  I hope you enjoy!

The St. Louis Arch

The Four at the St. Louis Arch


The St. Louis Arch


                                    Crazy Stuff 
from the Road

Horse Carriage on the Back of a Horse Trailer.
How'd they get that up there?
The Boy with Tow Mater!
That's right, this homemade Mater made his day!


Oklahoma Is Awesome

The Boy Riding a Tractor at Grandma P's Work.
The Boy Riding With Grandpa P.


The Cousin's Altogether for the First Time!


K's idea of a good time after a day of wedding chaos.
Yes, she is still in her dress Grandma P made her for
the wedding.
What would a vacation be without naps?
Or sickness?  The baby is sick; the mom
is taking a nap.


 Who doesn't love BOWLING?  It is fast becoming a
P family tradition, and even our little ones love it.
L won this round, but we will see who wins next time we go.

The Trip Home


We love trying out new parks on the road.
L loves the swings, and this one was right next to
a great Antiques store in Illinois.
Dad's love parks just as much as the kids.
This one was at our last rest stop before home.
The older girls like catching fireflies, but Mom and Dad
liked the old teeter-totter.


Springfield, Illinois

"The Big Girls" posing at the Capitol Building


Lincoln's Tomb.  We got there too late to go inside,
but the tranquility of the grounds was wonderful
after so much chaos. 

Lincoln's bust at Lincoln's Tomb.
Rub his nose for luck.

The Four at Lincoln's Tomb.
 Excuse the Mess Heads;
we had been in the car for almost two
days by this point.


These are just the highlights of a very long, but super fun trip.  It was so nice to go to things we normally just drive by.  We also took back roads the way home, and let me just say, SO PRETTY!  The crazy things we saw on the road was just a small fraction.  We saw some crazy stuff.  Thanks for stopping by, and leave a comment if you have seen some crazier stuff, or an experience of good ol' road trip fun.  Have a happy day!

Wednesday, March 28, 2012

The Hunger Games T-shirt Tutorial

Hunger Games T-shirts spray painted or foam brushed (KEEP CALM AND GET CINNA AS A STYLIST).
We foam brushed all of my hubby's shirt, but I spray painted the box and then foam brushed the lettering and sleeve detail.
In the coming months I am gearing up for a much more complicated tutorial for a birthday present I am trying to get together before May.  This is my dry run on figuring out how to do a tutorial for the first time.  I will have you know that I know about zilch about blogging, but I am trying really hard to learn. I wasn't expecting to do a blog on this so there are not enough pictures, I apologize for this ahead of time. So if this is helpful, let me know.  If you have tips, you can let me know that too, but please be gentle with me.  Here goes nothing!

I love new stories, and seeing good stories succeed in the mind-numbing garbage that Hollywood normally puts out for us to "enjoy."  Please don't misunderstand I love a good brain-veg every once in awhile, but what I really love to see is great storytelling.  With that in mind, I go out of my way to make sure that a story or movie I like gets all the attention it deserves  <we vote with our money people>.  So, naturally, I made my husband come with me and his sister to The Hunger Games midnight showing in shirts we made for the occasion. The great part is you can do this with anything, and I mean anything, you want. We took lines and shapes from our favorite book, but I am thinking about doing a Toothless (How to Train Your Dragon) shirt for my boy.

You will need a few things:
1. a T-shirt or some other kind of fabric
2. fabric paint (we found ours at Hobby Lobby) or spray paint (any store that has a hardware department)
3. freezer paper or vinyl
4. cardboard (we used a shoe box and an empty diaper box)
5. painter's or masking tape
6. exacto knife
7. foam brush
8. a good friend or at the very some good music

1. Make the stencil
Once you decide what you want on your fabric of choice you need a stencil.  Now if you have an awesome friend like I do, and she allows you to borrow her sillohette (or circuit), DO IT.  If you don't have one or know someone who does, may I suggest making friends with someone who does. If that isn't an option, don't throw this tutorial away yet!  You can still get what you want it will just take a little extra effort.  Freezer paper is now your best friend and an exacto knife is the enemy you have to make an alliance with to win the war. One of the girls we were with free handed the Mockingjay graphic onto the freezer paper. Dana over at MADE has a great freezer paper tutorial here.  Either cut out the stencil on vinyl with your nifty machine or cut it out of the freezer paper.  If you are doing the freezer paper method you will now iron your design to the fabric.  The vinyl people out there need to get your exacto knife, tweezers, seam ripper, whatever tool you need take out all the pieces of your stencil that will be painted.  If you are doing multiple colors on one stencil take out only the pieces you are going to be painting first.  So, this means that if it's going to be white, leave it on the stencil and if it will be black take it off.  This is what mine all look like.
This is the sleeve detail for each shirt.  If you don't recognize it, this is the graphic in the books at the beginning of each chapter.

2. Get the stencil on your fabric and Prep 
Alright, get that masking tape out and tape over your stencil.  Take the paper backing off of the vinyl, line it up where you want it, and stick it.  Carefully take off the tape; carefully because you want all the little middle parts of the letters (the tabs and bubble parts) to stay exactly where they are.  If you need to, use your tool of choice, just get them to stay.  (Obviously, if you are in the freezer paper camp you don't need to do this step.)

Now for a little prep.  Stick a piece of cardboard in between your front and back pieces of fabric.  Cover any part of the fabric that isn't going to be painted especially if you are spray painting.  Shake your paint.

 3. Paint Away
If you are going to paint it with fabric paint then get your foam brush out and dab it on the stencil.  Make sure that you cover all the space, even the edges.  You might need lots of paint to get the consistency you want, but remember the more you put on the longer you need to wait before you try to pull it off.  If you are going to paint with spray paint then spray in short bursts until it is the shade you want.  I originally wanted my entire shirt spray painted, but the white wouldn't show up in the stenciling very well.  We tried angling, straight on spray, and multiple coats.  It just wasn't giving me the look I wanted, so we improvised.  Don't be afraid if it doesn't work out the way you want it to; this is a process and there is some learning curve to it.

4. Dry time and remove stencil
Now this part may be hard, but wait.  DON'T TOUCH.  Let it dry for twenty minutes and then you can chemck.  If you don't get paint on your fingers then pull the stencil off using your fingers and an exacto eknife.  Get your friend's fingers involved and have them hold down your fabric so the stencil comes off easier.  Once all of the stencil is removed let your fabric dry for a few hours longer.

5. Set your paint
To set your paint, you need to iron your design on both sides of the fabric for five minutes.  Use a rag or towel between the iron and the paint so you don't get any paint on your iron.  I set my iron on setting 4.  Wash and dry and you are done.  If you chance to get some paint where it doesn't belong (I did twice), DON'T IRON IT.  After you set the rest of your design, use some stain remover, rub it in, wash and hope it comes out.  Both of mine worked out that way.  So there you go!  Five Hunger Games shirts ready for the midnight showing.  We had a great time, and I hope you find an event to make shirts for soon.  Enjoy!
The Hunger Games midnight showing.

Thursday, February 16, 2012

So Where Have I Been?

Obviously the craziness just hasn't stopped for us, but I thought that it has just been too long since I have put something into the universe.  We have had some exciting days...L asked C, "What are you going to be when you grow up?" C answered, "Hmmmm, fighting dragons."  L, "You can't fight dragons, C; they are extinct."  C, "No, I fighting dragons."
We celebrated Q's first birthday with lots of stripes and my husband's birthday the next day with a lot of chocolate.  Hubby and I went for a short weekend away. <thank you grandparents and aunt for taking the kids>  It was wonderful!  We didn't do a dang thing and we slept in that morning.  FANTASTIC!  Who would have thought that a warm bath (or two), nice bed, and a wonderful hubby time could be so rejuvenating?  It was so wonderful.
Hopefully I will be able to post some pictures soon, but for now just know that we are well and busy, busy, busy.

Monday, December 19, 2011

Is There Any Other Way?

If you are like us this time of year we are generally busy.  However, for those of us who have extra holidays smashed into the holiday season all I can say is may you have better luck than I in trying to not be busier than possible.  We not only have the holidays starting in October with Halloween (something that didn't happen until recently), but we have two birthdays--one in December and one in January--and an anniversary thrown into the mix.  Whoo Hoo!  Bring on the Mayham!  We certainly have some going on here.  We have been running like crazy people since Halloween.  I guess I wouldn't have it any other way, but man sometimes a girl just needs a breath of fresh air before barreling onto a new something.  Well, I have finally figured out my camera and how to get them onto the computer so just for the heck of it, enjoy some pictures of the cutest children on the planet.

The three "big kids"

The munchkin
At the apple orchard earlier in the year.  Finally all four in one place!

Friday, October 14, 2011

My Superhero

Lately my son has been crazy over superheros in all their characters.  We see Spiderman on backpacks while dropping off the first grader.  We tie on the Superman cape as he goes zooming through the house rescuing the damsels (all three sisters) in distress.  And I have been his favorite "bad guy" to karate chop.
Last night my knight in shinning armor (that's right Daddy made him an oak sword out of scraps from the workshop), came down in his big sister's pink tutu.  "Look Daddy.  Skirt," and laughed his head off.  My husband kept a straight face and asked him what color it is, "Piiiink."
"Do boys or girls wear pink?"
"Girls."
"Go take it off and put it away please, son."
And as bright as can be, "OK."
I couldn't hold back the giggles as my super-manly, pink-skirted boy toddled back upstairs to play tools with his reluctant sisters.

Tuesday, October 11, 2011

Zoo Times

There isn't much to do on a lazy fall afternoon.  I should be doing my laundry (my kids think the laundry fairy does it, but it is her day off today), but I decided to enjoy the warm sunshine while it lasts.  Yesterday, we went to the zoo with about a million other families to celebrate Columbus Day.  We watched my two-year-old son watch the tiger pace his rocks waiting for his dinner.  We listened to my four-year-old daughter squeal with delight when the giraffe spread his legs so wide to nibble on the grass instead of eating the leaves.  Our ten-month-old was delighted she could stand toe to glass with sting rays as they glided by her.  The queen six-year-old has been searching all season for a peacock (they roam freely) and FINALLY found two females this trip (thank goodness).  Monkeys and bears, zebras and snakes.  PHEW!  I am bushed thinking all about it again.