Showing posts with label Tutorials. Show all posts

Tuesday, June 26, 2012

Celebrate the BoyPart 2


His Birthday Finally Arrived!!
The Mat All Finished!!

This is the second part of the Car Mat/Blanket Tutorial, and I am as excited as you are to have it done for the boy's birthday!!

The biggest problem I had researching for this was I just needed closer and lots more pictures of what these wonderful moms had done already.  I found this place that was good, but here are mine so you have more to look at and get those creative juices flowing!

USAF Fire Station 1 complete with flag and dalmatian.

Farm where Grandma C grew up complete with apple tree, corn field, and a chicken.
The corn I hand embroidered into the striped field.  It really made it POP.

Who doesn't like their local ice cream store?
The roads are black felt heat-n-bonded on then just straight stitched with yellow along the edges.
I only used the applique stitch in black on seams where two roads met.  There is a smaller applique stitch in yellow down the middle of the roads.  This was my last sewing step and it felt good to have it down.

A downtown Chicago building.

John Hancock Building.  This one has the iron cross sections and radio  rods on top of it.
The cross sections are just straight stitching diagonally across.

'Da Bears play at Soldier Field.

My Hubby is a South-sider (White Sox) and I bleed blue (Cubs).  I tried to find some icons for it, but didn't succeed.
I will add patches later if I can find them.

School house with swings, flag, and ringing bell.

All-Star Gasoline the pumps are the ends of one shoelace. 

Train station with tracks and sign.  The sign has a train button; the tracks are black ribbon sewn
down the middle to stabilize and grey piping sewn over the ends about 1.5 inches wide.

Camping in the mountains.  The tent has red stitching to show lines in the tent, applique around,
and white lines out and to the the stakes.  The fire and trees are appliqued on wood then leaves or flames.
Mountains are for camping.  I put the "Y" detail on because our boy was born right next to a mountain
with a very similar "Y" that lit up on a good night.

Our home looks simple, but there are five separate parts to the building:  chimney, roof, structure,
windows and door.  Make sure to get every piece with your applique stitch and in an order that makes sense.

Trees were TOUGH, but we have forests in Illinois.  Everyone is slightly different, but every one was a pain
because of the curves in each one.  I skipped my normal three passes on applique and only did two on these.

Our public library has a funky roof line and TONS of glass.  

My hubby builds furniture, so naturally this is where most of the cars end up helping Dad.

I know it is supposed to have a t at the end, but t or not, the boy knows exactly what this store is.
The orange strip across the center is just the same applique technique I have been using just in a straight line.
The flag poles, radio poles, masts, swings and similar architecture features are all done the same way.


To finish off your blanket, you need to get the back material attached to your front material and bind it together.  I used clear thread and went around each buildings outline to bind the two fabrics together.  You could quilt it more traditionally if you like, but I'm lazy.  The clear thread was difficult to work with and probably took the most patience.  I made my own binding using this tutorial since I had never made my own.   Pin your tape around your blankets outer edge and sew around all the edges.  

Spread it out and get all the cars ready for a few hours of well deserved quiet time.

Entertainment for at least a few minutes!


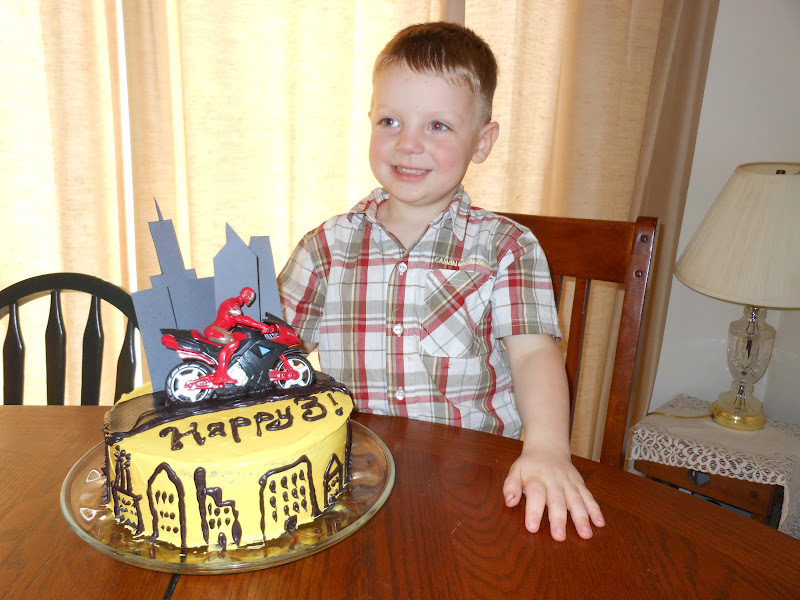
Happy Birthday My Boy!


Woke up to Balloons and a supersized poster of himself.

That is his "happy face."


Let me know what you think in the comments.  Hopefully this was helpful and you get started on your own little man's--or little girl's--car mat soon!

Car Mat/Blanket Tutorial

Believe it or not, I am not a sewer.  I wish I could tell you what a baste stitch is with confidence, but I just can't.  So imagine my sweet husband's surprise when I decided to tackle this....

Car Mat/Blanket All Finished!!  Yippee!!


 I had the idea in my brain and went searching the Internet to see if I could find something as a jumping off point.  I hit the jack pot when I got here.  This was almost exactly what I wanted to do.  The main difference was I wanted curvy roads.  As you can see I found out really quick that to get all that I wanted on my little guy's blanket I had to compromise the curvy roads and race track for the greater good.  I am going to attempt to help any other novice (or not so novice) sewers out there that want to do something extraordinary.  Every time I show this, I get a huge wow.  Here's hoping my little guy feels the same way when I have it all ready and wrapped for his birthday in May (I know the clock is ticking away).

So you will need:
1.   IMAGINATION AND PATIENCE
2.   Paper, stencils, pencils, ruler, erasers, and other office supplies
3.   Fabric scraps
4.   1 1/2 yards of a main base fabric (mine is the green corduroy)
5.   Lots of thread in all sorts of shades
6.   Sewing machine
7.   Heat n Bond (or whatever brand you use.  NOVICE POINT: This can be found in major fabric stores.  It is bought usually by the bolt [they have to cut it for you].  It is white and is the ironed on glue to keep your buildings in place while you sew them down. )
8.   Ribbon and Piping (Railroad)
9.   Buttons
10. Shoelace
11. At least 1/2 yard of black felt (roads)
12. Iron and ironing board
13. Embroidery machine (OPTIONAL. My mom has one so I used it, but I would have done it by hand if she didn't have one, or just left it out)
14.  1 1/2 yards of THIN batting if desired (I didn't use any)
15.  1 3/4 yards backing material (This is on the back.  The flannel for me.)
16.  Did I mention TIME (I have been working through this process since Halloween)

Alright, the pros to this project are you will be doing this for some time.  If you don't have everything all at one time, that is ok.  Work on what you can now, put it away until you can do more.  (In my case, when my budget allowed for it, or when something was on sale and I could get it then.) The cons are that it really isn't cheap especially if you don't have fabric scraps lying around because you are just getting into sewing or don't have the room to store all you would like.  I did find some ways to pinch a penny though.  My first tip is to go to the bargain bins at all of your major fabric stores first, then hit the local quilt shop.  I know you heard quilt shop and budget in the same paragraph.  I found a bunch of small squares (which were perfect for one building or some windows) for fifty cents or less!!  It is where all of my major building fabrics came from.  I spent about five dollars on all the building fabrics there and didn't even have to go to the bargain bins for anything else...SWEET.  The next con is that this sucker takes a lot of time.  My solution is planning, planning, planning.  I think I spent the majority of two or three months thinking, sketching, and laying out plans before I ever went shopping for material.

Speaking of sketching, it's your first step....Here is what I originally wanted my blanket to end up as.
See the race track that didn't make the cut?


As you can see it didn't really end up the way I wanted; as things went along some things just wouldn't work out.  You'll probably run into the same thing; relax, at least try to, and enjoy the process, if you can.

Once you have a rough draft start sketching the buildings first on paper and then on good, old card stock.  I found some great help on Google images.  Try typing in "school clip art" or "ship black and white," print it off and there is your fantastic pattern.  You could do a cave for dragons, or a scene from a favorite book of theirs, or even a sand castle (I thought of all this, of course, after I had already used every bit of space on his blanket.  Grrrrrrr.) If you need something pretty specific (the Willis Tower) type in "Willis Tower" and look at all the angles Google has and try your hand at sketching.  Get that ruler out ladies and gentlemen...It is your new best friend.
I have to admit that while I was working through this project I got asked many, many times what my scale was, and I had to say that I really didn't have one.  I know it sounds ridiculous, and it probably is, but I just eye-balled most of it. I knew Willis Tower needed to be the biggest so if the farm house was bigger than Willis Tower than it was too big.  Also, lay those card stock pieces on your base fabric so that you get a feel for the scale before you start cutting into any fabric. You can definitely do better than I did, let me know how it works out in the comments.


The Schoolhouse, Willis Tower, Fire station, and Hancock buildings next to their stencils.
My stencil for the roads is brown wrapping paper I got at IKEA a year ago. I rolled it out and cut three inch strips for the roads and 1.5 inch strips for the railroad.  It worked great!

Wrapping paper for road stencil.
Yippee, you have all of your stencils cut out of card stock, so now you need to move on to cutting out your fabric.  Get your building, fabric, and Heat-n-Bond ready.  IRON your fabric to your Heat-n-Bond FIRST.  I know you think it will save you money on the Heat-n-Bond to iron only the part you need for the building, but iron first, then cut out your building using your stencil.  SO MUCH EASIER!

Once you get each piece of the building cut out, set it with the rest of the pile and keep working until you get the buildings all set.  This will make it so much nicer to see on your base fabric. Don't iron anything until you have it all laid out.  If you don't you might find you made to adjacent buildings the same fabric or something just isn't working right.  

Once you get it all onto your Heat-n-Bond and set up exactly how you want it on your base fabric, pin away my friend.  I pinned everything down that you see in the picture above and then worked on one structure at a time.  Think through each structure BEFORE you sew.  For example:
The Pirate Ship and Lighthouse
In this corner we have--shore material, lake material, two light house materials, two ship materials, and six types of thread.  The shore HAS to be ironed down first, then the lake and hull of the ship can be ironed.  Before you can put on the sails however, you have to sew in the masts using the same stitch and thread you will use for the wooden part of the boat.  So I ironed, but didn't sew the shore and lake, but iron and appiqued in the hull and masts.  After the masts are in then you can iron on your sails.  I appliqued everything on with the appropriate threads.  AFTER the shoreline is ironed and sewn on THEN you can iron on your lighthouse and applique it on.  I appliqued the sails and lighthouse at the same time because both used black thread.  My sails sat ironed but not appliqued on for a week or two while I waited for the lighthouse to be completed.  The name of the ship I had embroidered just before I bound the blanket.

YOUR DOING GREAT!  I ironed on all of my buildings and then worked on applique for each one so I could easily move to the next building with the same thread if it was possible.  This will take a boat load of time, but it is worth it in the end.  See you on the next post for the rest of the information.
Wednesday, March 28, 2012

The Hunger Games T-shirt Tutorial

Hunger Games T-shirts spray painted or foam brushed (KEEP CALM AND GET CINNA AS A STYLIST).
We foam brushed all of my hubby's shirt, but I spray painted the box and then foam brushed the lettering and sleeve detail.
In the coming months I am gearing up for a much more complicated tutorial for a birthday present I am trying to get together before May.  This is my dry run on figuring out how to do a tutorial for the first time.  I will have you know that I know about zilch about blogging, but I am trying really hard to learn. I wasn't expecting to do a blog on this so there are not enough pictures, I apologize for this ahead of time. So if this is helpful, let me know.  If you have tips, you can let me know that too, but please be gentle with me.  Here goes nothing!

I love new stories, and seeing good stories succeed in the mind-numbing garbage that Hollywood normally puts out for us to "enjoy."  Please don't misunderstand I love a good brain-veg every once in awhile, but what I really love to see is great storytelling.  With that in mind, I go out of my way to make sure that a story or movie I like gets all the attention it deserves  <we vote with our money people>.  So, naturally, I made my husband come with me and his sister to The Hunger Games midnight showing in shirts we made for the occasion. The great part is you can do this with anything, and I mean anything, you want. We took lines and shapes from our favorite book, but I am thinking about doing a Toothless (How to Train Your Dragon) shirt for my boy.

You will need a few things:
1. a T-shirt or some other kind of fabric
2. fabric paint (we found ours at Hobby Lobby) or spray paint (any store that has a hardware department)
3. freezer paper or vinyl
4. cardboard (we used a shoe box and an empty diaper box)
5. painter's or masking tape
6. exacto knife
7. foam brush
8. a good friend or at the very some good music

1. Make the stencil
Once you decide what you want on your fabric of choice you need a stencil.  Now if you have an awesome friend like I do, and she allows you to borrow her sillohette (or circuit), DO IT.  If you don't have one or know someone who does, may I suggest making friends with someone who does. If that isn't an option, don't throw this tutorial away yet!  You can still get what you want it will just take a little extra effort.  Freezer paper is now your best friend and an exacto knife is the enemy you have to make an alliance with to win the war. One of the girls we were with free handed the Mockingjay graphic onto the freezer paper. Dana over at MADE has a great freezer paper tutorial here.  Either cut out the stencil on vinyl with your nifty machine or cut it out of the freezer paper.  If you are doing the freezer paper method you will now iron your design to the fabric.  The vinyl people out there need to get your exacto knife, tweezers, seam ripper, whatever tool you need take out all the pieces of your stencil that will be painted.  If you are doing multiple colors on one stencil take out only the pieces you are going to be painting first.  So, this means that if it's going to be white, leave it on the stencil and if it will be black take it off.  This is what mine all look like.
This is the sleeve detail for each shirt.  If you don't recognize it, this is the graphic in the books at the beginning of each chapter.

2. Get the stencil on your fabric and Prep 
Alright, get that masking tape out and tape over your stencil.  Take the paper backing off of the vinyl, line it up where you want it, and stick it.  Carefully take off the tape; carefully because you want all the little middle parts of the letters (the tabs and bubble parts) to stay exactly where they are.  If you need to, use your tool of choice, just get them to stay.  (Obviously, if you are in the freezer paper camp you don't need to do this step.)

Now for a little prep.  Stick a piece of cardboard in between your front and back pieces of fabric.  Cover any part of the fabric that isn't going to be painted especially if you are spray painting.  Shake your paint.

 3. Paint Away
If you are going to paint it with fabric paint then get your foam brush out and dab it on the stencil.  Make sure that you cover all the space, even the edges.  You might need lots of paint to get the consistency you want, but remember the more you put on the longer you need to wait before you try to pull it off.  If you are going to paint with spray paint then spray in short bursts until it is the shade you want.  I originally wanted my entire shirt spray painted, but the white wouldn't show up in the stenciling very well.  We tried angling, straight on spray, and multiple coats.  It just wasn't giving me the look I wanted, so we improvised.  Don't be afraid if it doesn't work out the way you want it to; this is a process and there is some learning curve to it.

4. Dry time and remove stencil
Now this part may be hard, but wait.  DON'T TOUCH.  Let it dry for twenty minutes and then you can chemck.  If you don't get paint on your fingers then pull the stencil off using your fingers and an exacto eknife.  Get your friend's fingers involved and have them hold down your fabric so the stencil comes off easier.  Once all of the stencil is removed let your fabric dry for a few hours longer.

5. Set your paint
To set your paint, you need to iron your design on both sides of the fabric for five minutes.  Use a rag or towel between the iron and the paint so you don't get any paint on your iron.  I set my iron on setting 4.  Wash and dry and you are done.  If you chance to get some paint where it doesn't belong (I did twice), DON'T IRON IT.  After you set the rest of your design, use some stain remover, rub it in, wash and hope it comes out.  Both of mine worked out that way.  So there you go!  Five Hunger Games shirts ready for the midnight showing.  We had a great time, and I hope you find an event to make shirts for soon.  Enjoy!
The Hunger Games midnight showing.